Wednesday, September 21, 2016

Heart Love - A Quilt for my Niece

This is the front of my niece's quilt, before it was sewn up, out on my 'design floor'. It made doing anything else difficult for a few days as I laid it out. Good motivation to get it done!


(Sorry it's tilted all weird and sideways. I'm sort of focusing on actually posting and not about the perfection of things. Also, I don't have room on my phone to take any more pictures and so this is what I have until I take time to delete other things.)

This quilt was all randomly done. I grabbed a handful of the first few blues (after laying them out light to dark) and I would go across the row making sure two of the same were never touching. If I could change anything, I would've gotten a better blend of pinks, but honestly, the options weren't super great and by the time I had finished picking out 17 blues, my two kids were a little less patient with me, so I wasn't the insanely picky self I usually am.

Anyway, for having designed it in the aisle at the fabric store, I am pretty proud of it. Simple construction, but still super fun and interesting. (She likes hearts and turquoise/aqua. And stars, hence the back piece.)

Yay for me for completing the another post! Hope you like,

tess


Tuesday, September 20, 2016

Star Fun - A Quilt for my Niece

So I've been having some issues, mostly with my computer being out of commission. (It's a long angry story). But with some copy and pasting I've realized I can post through my phone, which is where all my pictures are at the moment. Hopefully this means I will be more regular with my posts. I've got enough going on to post about. So, without further ado-


Here is part of the back of a quilt that I'm making for my niece. It'll be pieced together with some blue and pink plaid houndstooth fabric. (Trust me, it looks awesome).

(Quick apology for the horrible lighting. I stayed up until 1am to finish this. I wasn't  going to wait until morning to take a picture!) 

It was fun to be able to try out techniques and be adventurous (sewing without measuring-gasp!) and realize what I liked and didn't like on a small scale. (I love the strip star in the bottom left corner!). I've heard other sewers talk about this concept and I finally get it. 

-tess

Saturday, January 2, 2016

31 Projects in 31 Days (and a moose)

It's January.  I haven't really done this in a little bit, but since moving towns and unpacking all my unfinished projects, I've realized it's time to finish many of them.  Many have been around for years, many are 95% done.  So it is time.

31 Projects in 31 Days: it has begun.

I've even finished a project already.  But I'm slow on pictures, so it'll come tomorrow.  For now, here's a picture of my feet (under a blanket) and the moose that has been enjoying our backyard.  I've named it Magnus.


Magnus the Moose

Thursday, March 5, 2015

Scrap Buster #8, 9 and 10 - Scarf Happy

I got Scarf Happy.  And I realized that I can totally count these as scrap buster projects (well, 3 of them).  Very excited to use up some yarn.  Love it.

These are made for the lovely lady and girls that hosted my baby shower.  The mother is super thoughtful and we decorated (with paint, fabric, thread, markers) onesies, bibs and burp cloths at the party.  I was set!  (Plus they also gave us pretty much anything and everything we'd ever need for a child because they were done having their own.  We love them.)


I checked out her Pinterest pages to find out style wise what she'd like.  (I'm always terrified of making gifts for people specifically.  I'd hate to make something just for them and then find out they hate it.  I'm always scared I don't know enough about people to make something personalized).  Anyways, she had a pin of this scarf.  I ran with it.  (It was either this or boot cuffs, but I thought this was more exciting).


I bought yarn for this one, since I didn't have exactly what I wanted and she deserved exactly that.  This was the softest yarn I've ever felt.  I told her when I gave it to her that if she didn't want it, I wouldn't be offended.  I'd take it back and wear it myself!


Just a simple rib knit stitch with giant (size 13) needles and using both red and cream together.  You can bunch it up near your neck or stretch it out to hang down a little farther.  It doubles over, but you could open it up and have it high up around your neck.  Oh the possibilities.


For the older girl, I picked the fun colored variegated yarn.  I used a jay-walking pattern, which was so fun.  You knit straight across with some increases and decreases and it makes it into a chevron pattern.  So easy and super cute.

I love the ridges in it at the points.  It's long and skinny.  Probably more for style than warmth.  The style a 10 year old likes.


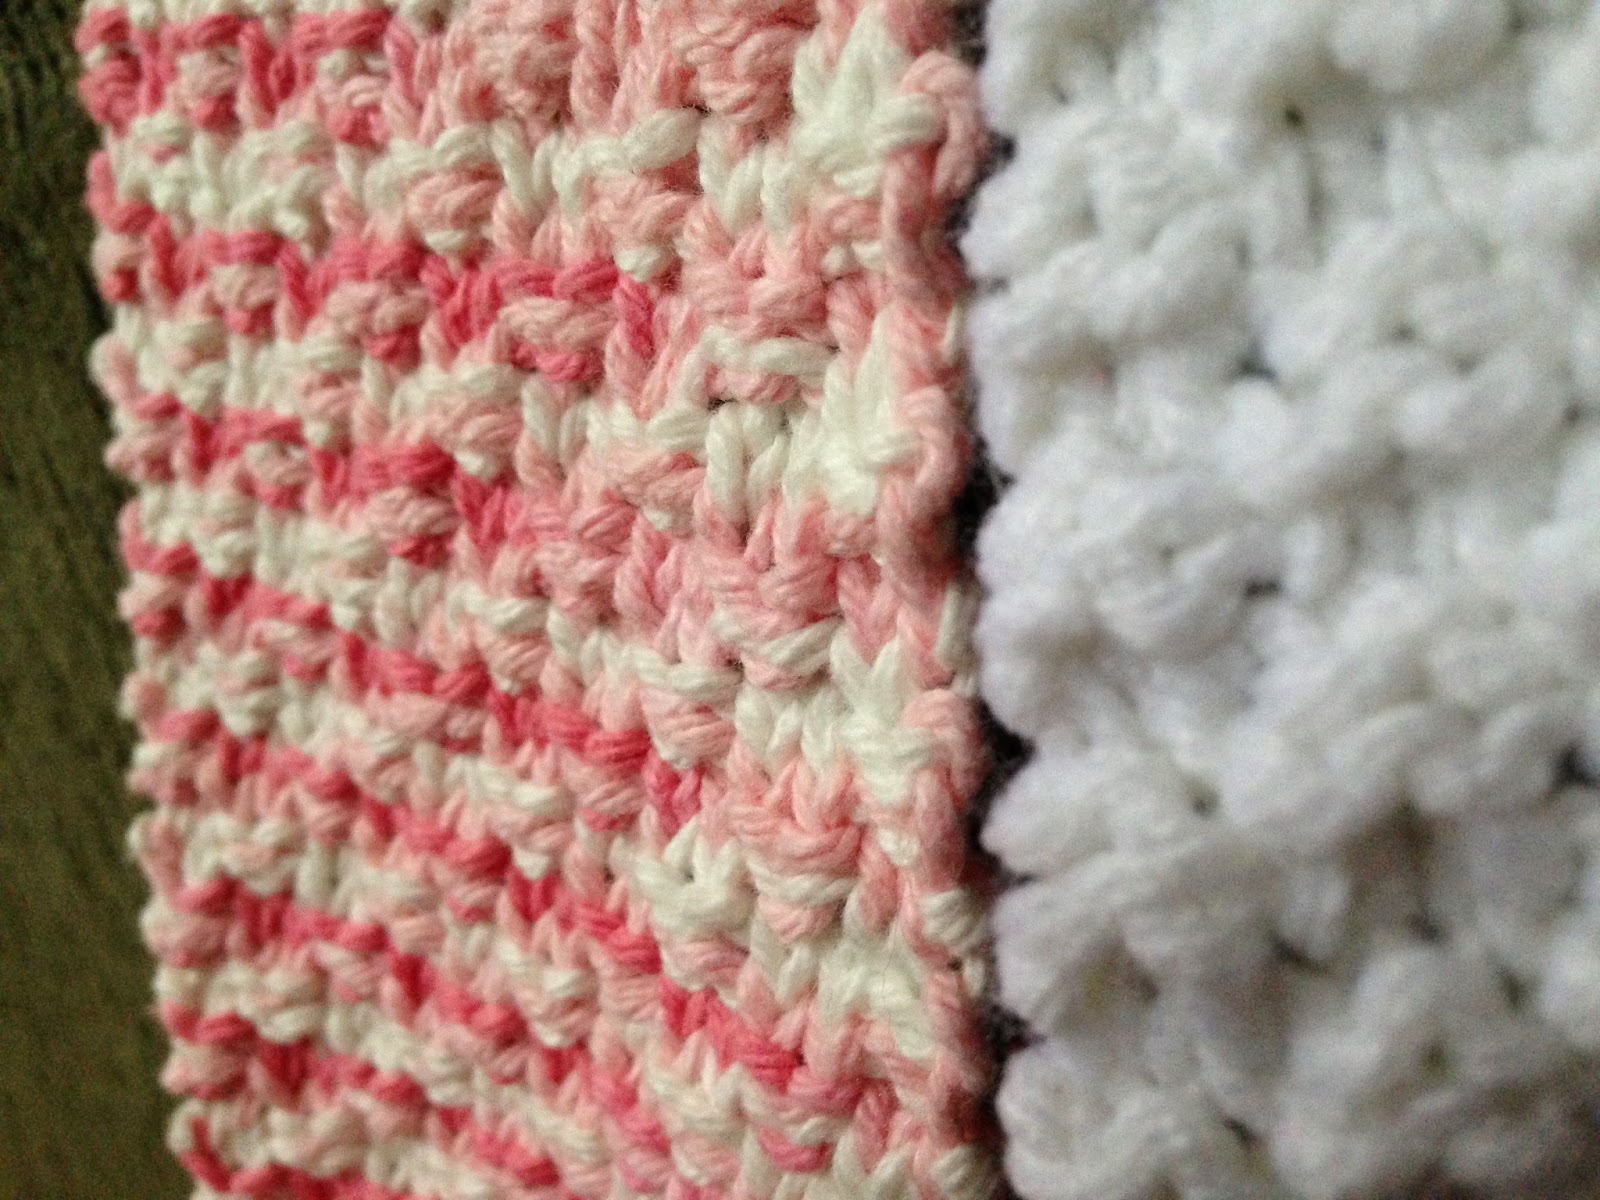
The younger girl is all about pink.  I used this sweet pink and cream variegated yarn but ran out, so I did the 2nd half white.  The stitch is a simple double seed stitch (k2, p2, repeat for 2 rows, then do the opposite, p2, k2 for 2 rows.  Repeat 4 rows)


I also folded up the ends and sewed the sides together to make little pockets.  Pockets are always good for hands or trinkets or secrets.  I love the texture on this one.  8 year olds need good texture.


 The last scarf is for me!  I saw it on purl bee.  I think the original pictures on the site are deceiving.  The middle section does not appear to be as long as they say it is in relation to the size of the tips.  They have added new pictures in new color ways and they are more accurate in size.  I think, at least.


I decided I'd use up a bunch of ends of skeins that I had.   I finished off the red, gray, blue and orange.  I've got plenty of the green/blue/purple stuff still, but I'm excited about that.  I just love the pop of red against the blue and gray, and the tiny pop of orange.  Well, I love it all, really.  The blue is gorgeous and the colored edges are just fun.


Very simple garter stitch makes it a little thicker and stretchy but still super soft and cozy.  Love the tapered ends.  Perfect neck height when folded in half.  Tucks under jackets really well.  My tips are curly because I didn't block it.  I'm ok with that.


Super soft blue wool.  So excited to wear this more! I'm a scarf-o-holic.  Good thing I gave away 3 of these.  Though again, I would've kept the first one.

(I realize I jumped from scrap buster 5 to 7.  I have written the post for 6 but I haven't taken the pictures yet.  I'll have to get those done.)

See you sooner than when I said I'd see you soon last time!
(Hopefully?)

Friday, November 7, 2014

Scrap Buster #7 - (Ugly) Clothespin Bag

I used to have a friend in college who asked me to make him ugly mittens to match the ugly scarf his mom had given him.  It was the most hysterical and difficult thing I did.  It's hard to purposefully make something ugly when I usually do everything I can to avoid that.  And I wasn't sure if he wanted hideously ugly or just not very pretty.  I made them hideous.  He loved them.  That worked out.  He later commissioned a hat of the same variety.  Also hideous.  I learned to let go of my need for everything to always be esthetically pleasing.


Bringing me to my clothespin bag.  We line dry everything and desperately needed a bag in which to carry our clothespins.  I didn't like the ones that hung on the line because I'd have to drag it along the line as I pinned things up.  I didn't plan on keeping it on the line in between dryings since I didn't want it getting rained on.  I ended up just making a basic bag shape and then put straps closer to each other on one side than on the other to tie around my waist, making the opening fall open away from me so it would be easier to get my hand in and out.


The bag is made from 2 9-patch squares I made over 5 years ago with random fabric I had at the time.  I had 2, so I decided to use one for each side of the bag, but I didn't really like all the fabric and I didn't like how they were arranged.  I just wanted to use them up.  I ended up doing a disappearing 9 patch on it first.  Then I did the disappearing 4 patch technique on it, mixing up the pieces from both sides until I liked the arrangement better.  (I still don't love it as a beautiful thing, but I like it better than what I started with.)  I then used some fun palm tree fabric (again, stuff I wanted to get rid of) as the bottom and sides to make it big enough to house all my pins.  I lined it with some greenish/purple floral fabric (again, get it out of my stash!) and made the handles out of the same material as the lining.  Sewed the handles on and BAM! Clothespin bag.


It works just great.  Do I think it's beautiful? No.  Do I love it's function?  Yes.  Will I redo it?  Probably not until this one falls apart, so not for a while.  There you go.  I let go of perfect beauty for the purpose of function and clearing out fabric.  I feel good about that.  Yay for line drying!


See you soon!
(I've been doing better at keeping this promise lately!)

Friday, October 31, 2014

Scrap Busters #4 and #5 - A Bassinet and Mattress Pad

I had a baby!  I figure if I start with that, no one can complain about a little lack of posts.  Though my baby is three months old and I haven't published a post since way before that, but hey, prepping for a baby is time consuming, too!  Anyways, as my husband holds our baby (both are actually sleeping, cuddled together.  It's how they bond) I get to write this post!


I made my baby's bassinet.  I really wasn't liking anything I saw online, I don't like frills and stuff (we didn't want anything too gender specific anyway).  I had looked into baskets, something we could line and put a pad down in, but they were so expensive.  I don't like expensive things, even if someone else would buy it for us as a group gift.  Sometimes things just shouldn't be that much money.  So since my mom came out early (because I started having fake labor and she's about a 14 hour trip away from us and didn't want to miss anything if it happened fast) we decided to make one ourselves.


Of course, she has all the pictures of the making of the bassinet, so I only have the finished product.  Every single piece of fabric in the bassinet is something I already owned.  Yay for using up fabric!  The outside is pieced, made from some heavier fabric, possibly duck cloth?, that I got for 50 cents at some thrift store.  We almost made it strips like the German flag, but thought that was a little too much, so we settled on paying homage to Germany through the colors and mixing up the strips a little.  (Those three colors are the only ones I had, they just happened to be the German flag colors and my family just happened to live in Germany, so that was fun).  It was actually quite easy to make.  We just sewed long strips together in the following order - black, red, black, orange, black, red - with the red and orange strips being 2.5" wide and the black 1.5" wide.  Then we cut them into strips 2.5" wide and flipped every other strip upside down and sewed them all together to make a huge loop.


The inside is an old rice bag that I had carried around forever and found out that my mother actually got it from Hawaii when she was young, so yay for finally using it!  We just cut it in half and used part of the back added above and below the two halves to make it long enough to fit the pieced outside loop.  The bottom is two layers of the same fabric as the outside, as are the handles.  


The inside and outside both have a layer of batting sewn to them and we made little pockets between the lining and it's batting layer to put 8 pieces of boning in to help keep the sides upright.  Then we stitched a bottom to both the inside and outside (leaving a space on the inside one to eventually turn it right side out).


We sewed the tops of the two layers together, adding the handles in as well.  We then did a little quilting, stitched in the ditch in the seams near the boning (sometimes it was right through the boning, other times it was the two seams surrounding the boning) to help keep the two layers together and not bow with the boning.  We then hand stitched the opening in the lining shut and Ta DA!  We have a bassinet for my baby!


It ended up being about 3 feet long and about 18" wide at the longest and widest points.  We also made the mattress pad using old fabric (every piece of fabric that I've stored for years and always hated but could never get rid of) and 4 layers of some polyester batting that I bought a while ago and never used.  It's all stuffed in a big oval shaped pillowcase, basically (also with ugly scrap fabric).  We made two sheets for it (we bought fabric for the sheets - shock!) and it was ready for a baby to be laid in it.  Which was good, because my water broke later that night and I had the baby the next day!


I really like this thing, even though it was a little bit of a pain at some points (always double check things are right before you sew them.  Unpicking stinks when your stitches are small and plentiful because it was on a handle that you wanted to be secure.)  My favorite part about it (and the reason I wanted something like this) is that when the child is old enough to no longer fit in it, we can use it as storage for stuffed animals, toys, blankets, etc., and it can become something the kids will play with (which was proven when our niece (2 yrs) and nephew (9 mo) came to visit and both immediately went and sat in it.


So there you have it.  An awesome bassinet for an amazing baby.  I hope you enjoyed this haphazard explanation of my project.  I also am counting it as my Scrap Buster projects Nos. 3 and 4, since it was the bassinet and the mattress pad.  Yay for progress!

See you soon....?
Maybe with another already finished project!

Monday, September 22, 2014

Scrap Buster #3 - Personal Progress Values Bag

I am an Activity Day leader for girls ages 8-11 in The Church of Jesus Christ of Latter Day Saints.  It's really fun and the girls are amazing.  One fabulous girl is graduating in a week because she is turning 12.  She is moving on to the 12-18 year old group of girls in Young Women and she will be starting Personal Progress, which is really exciting (and I have a feeling she will looove going through the activities in there).  The sad thing is she is leaving us.  Luckily we still get to see her every Sunday!  As a little goodbye gift, I decided to make her a bag.  Of course I decided this about an hour before her goodbye party started.  After 5 (frenzied) minutes of looking through bags on Pinterest, I decided to go for a floppy bag.  It closes without closures and it's a quick, basic structure.  


I ended up choosing to make the body with the 8 colors representing the Personal Progress Values (Faith, Divine Nature, Individual Worth, Knowledge, Choice & Accountability, Good Works, Integrity and Virtue).  The colors are white, blue, red, green orange, yellow, purple and gold.  I had the blue through purple fabrics left over from my WhirlyGig Quilt.  


The gold and white were other scraps, not quilting cotton.  I decided to put a band of those on the top of the other colors, one on each side of the bag.  The strap is from webbing that I had picked up at a thrift store.  It's sewn into the sides where the rainbow and top block of color meet.  The inside is just black quilting cotton.  


This bag was designed, cut and sewn (and last minute photographed) in 45 minutes.  I'm pretty proud of myself.  It's not perfect, but I didn't use a single pin (most obvious issue is the puckered white fabric, but it's quaint because it was homemade, right?)

I hope when she uses this bag it will be a regular reminder of all the amazing qualities she has and is working to strengthen.  She already said she wanted to use it for her Sunday scripture bag.  I love when what I make is used.  

See you soon! (I promise!)
(With projects that have been completed and just need pictures added to the posts)