Thursday, April 25, 2013

Cheese and a (WiP) Quilt

I was looking in our cheese drawer the other day for some tastiness to add to a savory crepe sandwich when lo, I beheld that we had quite a selection.  I was curious and soon discovered that we have 12, yes 12 varieties of cheeses in our fridge (14 if you include cottage and cream).  They are: spicy cheddar, pepper jack, asiago, smoked gouda, spiced gouda, gorgonzola(crumbled), another nameless blue cheese(solid), fontina, gruyere(we actually have 2 packages of this - we love it), parmesan&romano(combined so counted as one), feta and laughing cow.
I love cheese!

Anyways.  I decided to start a quilt.  We'll see if I end up liking it.  I got inspired by, and am using Quiltville's post as a guide.  I love it because it's an all scrappy quilt, no unifying sashing or anything.  But my possible problem is that my scraps aren't from other cute quilts like good scraps are.  Mine are random fabric I've acquired from old clothing, thrift stores, clothing/whatever swaps and things found on the streets.  I don't know what material is used for most of the fabric.

Here it is: so far a bunch of strips cut and placed in 6 strip blocks.  I placed them in a rail fence pattern to separate them visually but still pack them into my enclosed sewing area.  

I needed 5 more squares, and I'm cutting entirely new fabric for the most part so they'll get rearranged.  The hard part is not knowing how it'll look in the end.  I know it'll change once it's all cut and resewn and there are few layout options as well, but the suspense is intense!  

Below is the pile of strips for the above squares (6 strips/block x 19 blocks = 114 strips measuring almost 3 inches tall).  I've gone through some MacGyver, the Voice, The Fashion Star, Project Runway and Hell's Kitchen episodes to cut them.


I'm a little nervous about the end result, but strangely getting more excited as I write this.  I got a new iron today, too, since my old one just decided it didn't like being hot anymore.  So now I can unwrinkle the rest of the fabric I need to cut and maybe tomorrow (finger's crossed) I can start sewing blocks together.

One thing I am excited about (which I know may put me in a minority) is that once they're all sewn and recut into tubes (check Quiltville's page to understand the process), I'll have work to take with me for on the go, waiting in a line, got to class a few minutes early, waiting for the red light at the bottom of my street that sometimes takes 2 minutes to recognize I want to get across.  I love having something to do when I'm not in the house.  Yay!!

So I'm working on this one.
Excitedly.

See you soon!
(with a quilt top sewn?)


Thursday, April 11, 2013

Baby hats! (For other people's children)

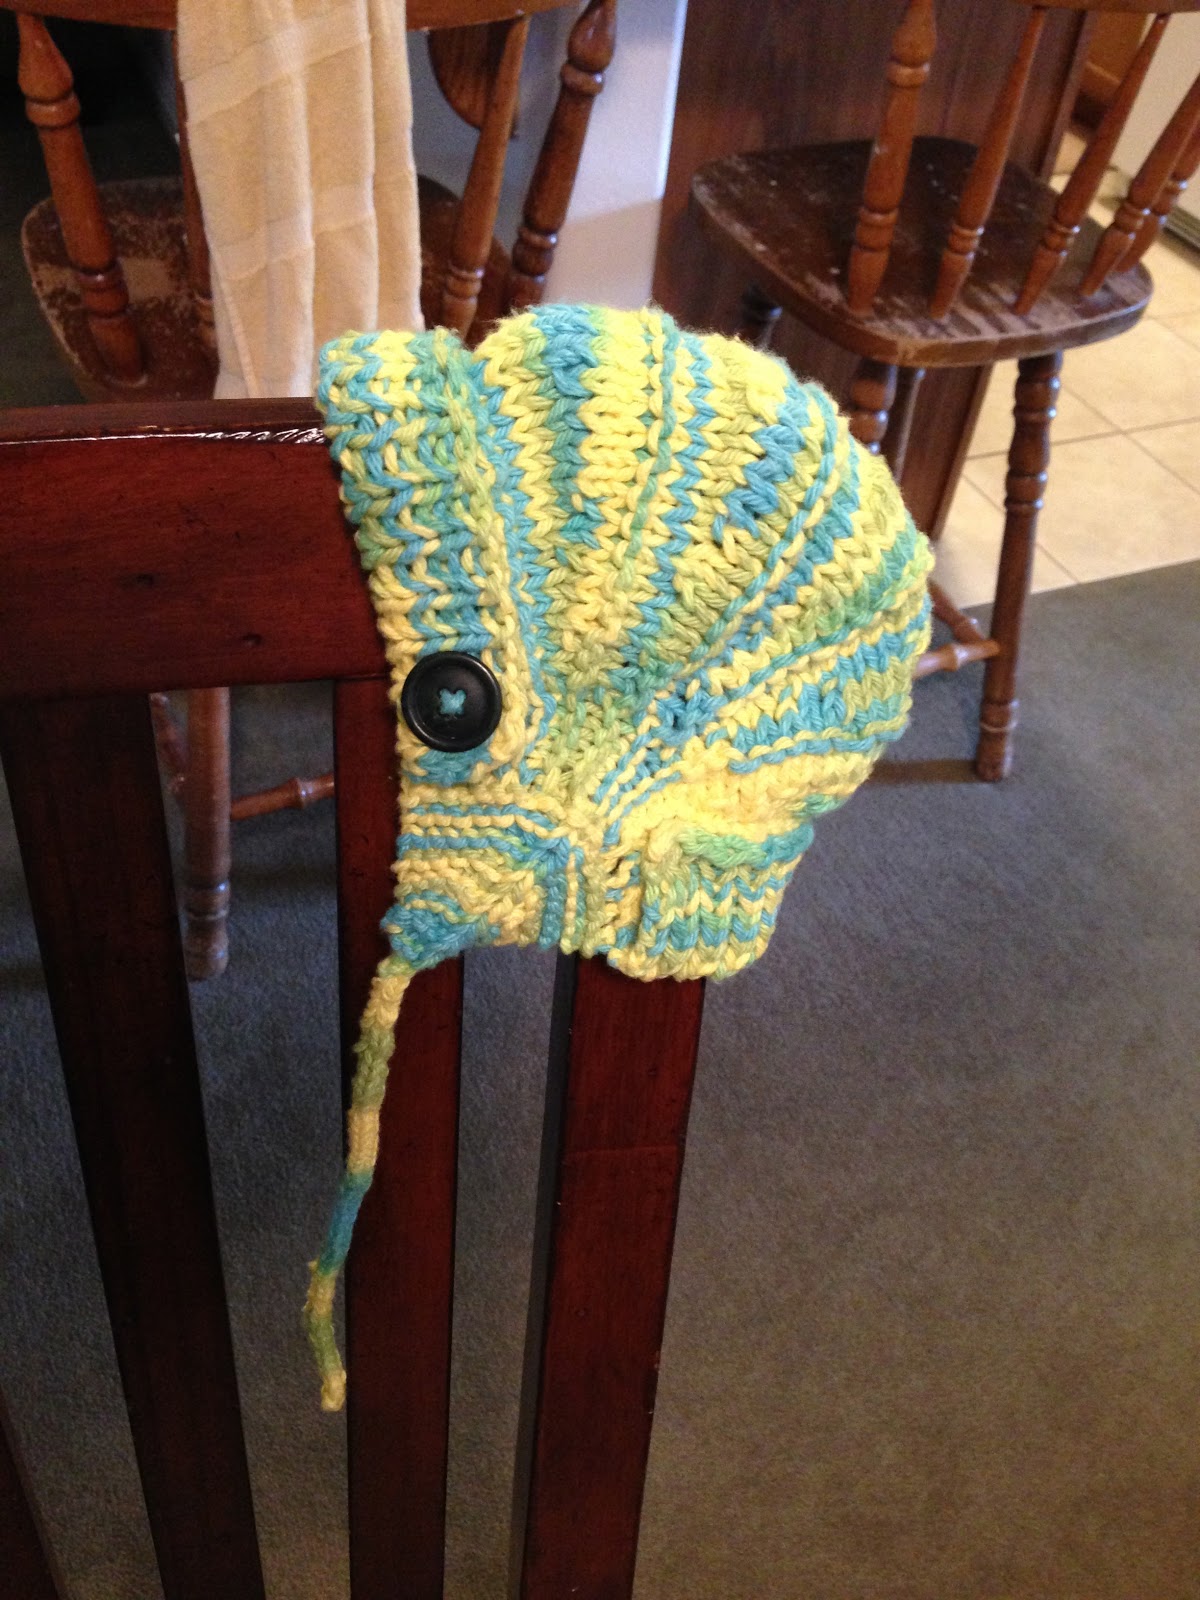
There have been a few births at my husband's work lately, and since I have a large stash of yarn that hasn't been used, I thought it would be fun to make some baby gifts.  I found this adorable pattern on ravelry and fell in love.  So I made a girl's first...


... and then a boys.   I altered it a little for the boy, doubling the front and back ribbing and folding them over for a thicker/warmer feel.  I added decorative buttons on the front flap and knit icords to tie instead of a buttoned strap.  


I just think they're adorable - they use short rows to get the <> shape on the top of the head.  And they are a fast project.  Completed in the space of one movie once you get the hang of the short rows pattern.   I think this will be my new staple gift.  (Sorry I don't have an adorable baby to pose for these.  Just guitars and chairs!)

See you soon!

Sunday, April 7, 2013

I'm Working It Out! - Sewed Wall Picture

So I have this project... (surprise!)
And I'm stuck a little in the middle... (surprised?)
So I'm starting a re-occuring titled post (which is the wrong way to describe it, but the right way is not coming to me). 

I'm Working It Out!

I can't remember where I got the idea for this, but I wanted a way of putting a picture on the wall without actually having a picture on the wall - I'm cheap and big prints are pricey (and then you add frames and mats.  It's too much for me).  So I thought instead of doing almost a coloring book version of a picture of me and my husband dancing at our reception - meaning just black outlines, a little shading - no color or details.  And it would be on fabric because I have way more fabric than paper.
Now to get it sized big enough to put on the wall - I zoomed in on the picture in iPhoto and traced the outlines on paper and taped all the papers together. Slightly awkward but effective.


As you can see, it's 3 pages high by 2 wide, so about 33"x17".  I kind of love it.
Here's the original picture (cropped to about the same dimensions).  It was a little blurry, but I loved the light coming from behind us.  It really helped in the tracing phase.  
Side Note - I love my dress that my sister and I made together.  She did all the hard stuff as she's a professional.  Check her blog out - it's awesome.


Here it is on the wall, around where I'd put the finished product.  (I love my ties and hexagons!)  I didn't take the pictures for the intention of blogging, so quality is lacking and apologies are extended.

The next issue was how to create the image on fabric.  I traced it onto the fabric I want (a beige/cream with a little shiny diamond pattern (I think it's diamonds - I'm in another city, so I can't check))
{Haha, I had double parentheses - I feel like I'm writing math problems and you have to make sure that you match all the brackets or all the calculations will blow up in your face.}
Moving on...
I thought about drawing it on, but I thought 'It's on fabric, it should be sewed'.  I tried just sewing the lines but I was having issues with tension and it kept pulling noticeably.  So I think I might be hand sewing the lines on.  Then again, it'll take longer - maybe I'll fiddle with tension a little longer, it may save time overall.  

But I'm kind of really excited about this one.  It's a secret surprise for the husband, but he doesn't even know my blog address (unless he randomly does and in that case, surprise!!!) so hopefully the secret's safe.  I'm hoping to definitely get it done for our year anniversary (that's in 2 months.  Should be no problem, but you never know).

See you soon!
(hopefully with some finished stuff!)

Tuesday, April 2, 2013

I live in IDAHO!!

So I've been here for almost 10 months now, but it's such a far cry from Brooklyn (and Detroit) that I still get some fun surprises (or headaches) from living here.  This one's a funny one. 

 I was getting ready to be upset about some slow moving traffic.  


Then I got in the turning lane and this was in front of me.  


Welcome to Idaho!  I've seen tractors on the road when I went to school upstate NY, but this, this was pretty exciting.  Yep.  I wasn't mad about traffic anymore.  I need more hay trucks in my life.

See you soon!
(and hopefully more hay!)

Friday, March 29, 2013

I made a Skirt! (and lost 4 teeth!)

So I got my wisdom teeth pulled on Monday.  It's sort of funny, I was most nervous about being knocked out for it and it turns out I got to stay awake!  I was a little sad that I couldn't see what was happening except for a little reflection in the dentist's goggles, but I got to see the teeth at the end.  So cool!
But anyways, since it's spring break I don't have any classes to take or lessons to teach and I'm not 100% back to my typical energetic, intellectual self.  So I'm crafting, and taking my time at it.

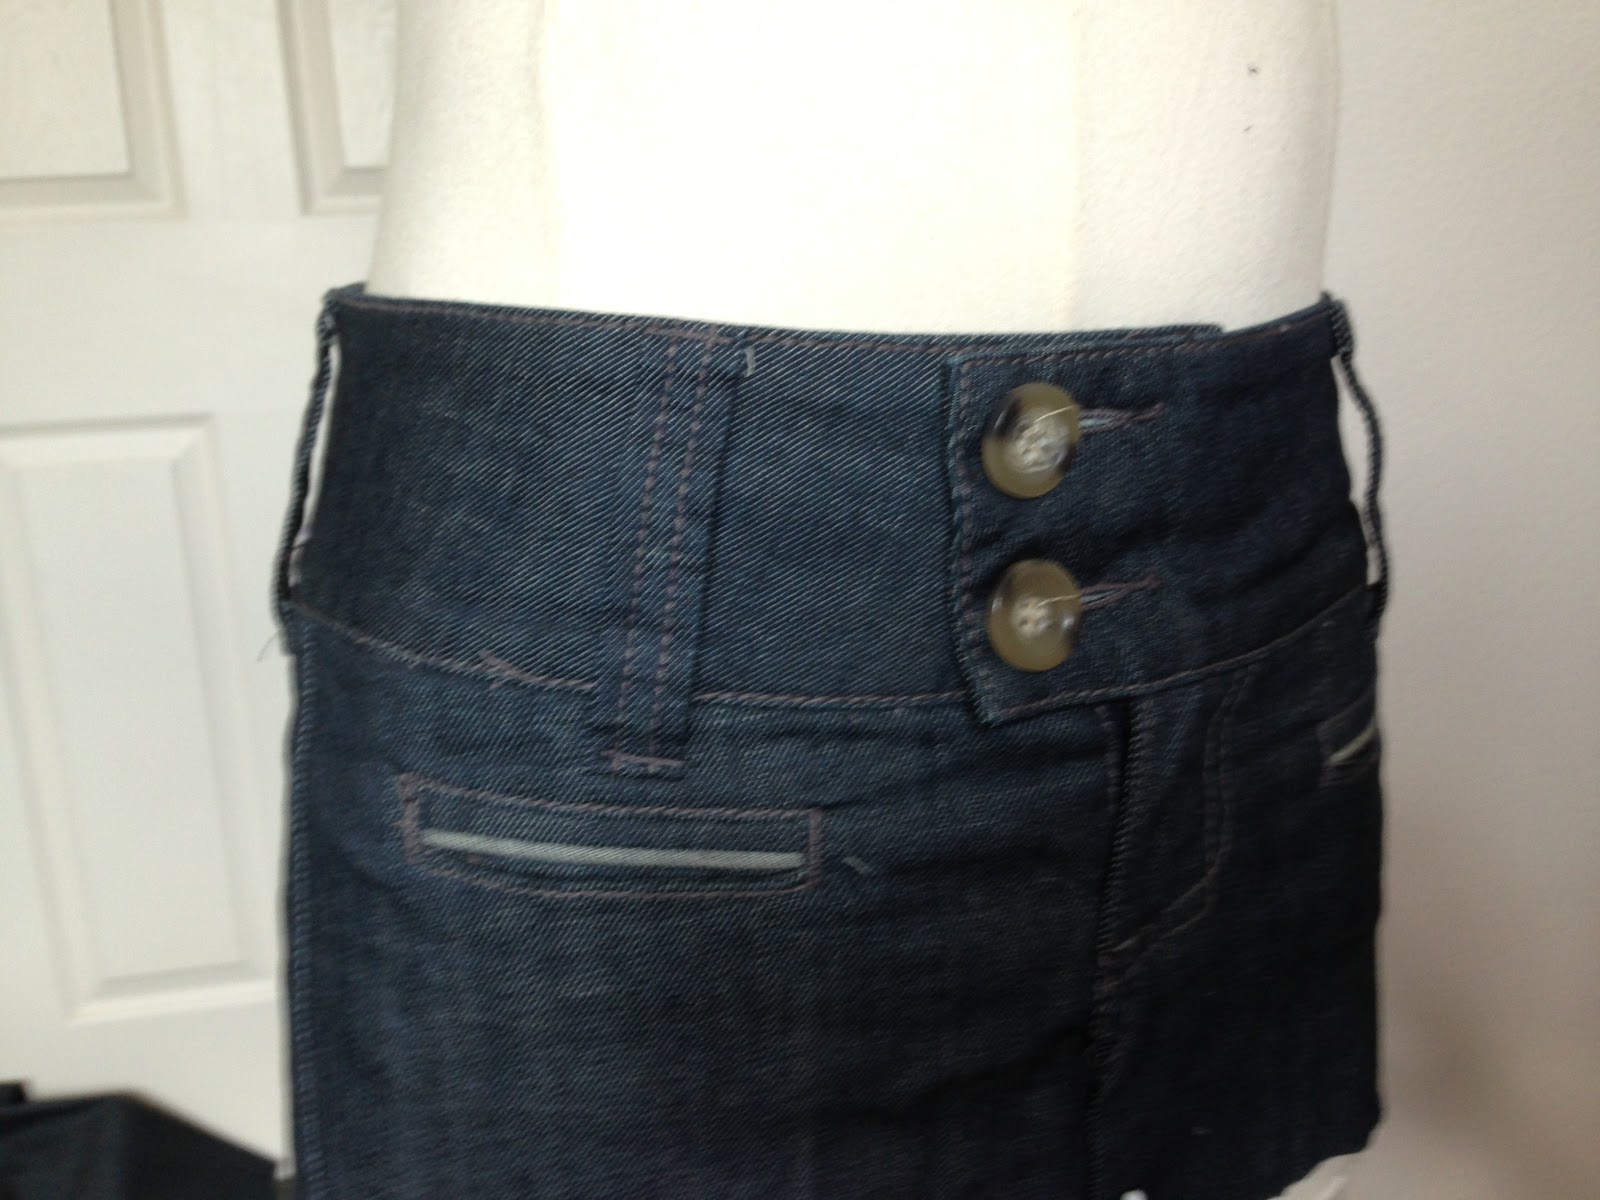
I got these pants at a clothing swap, I believe, and I'm not sure why I took them.  Not quite my style and I didn't think I'd wear them.  And over a year later, I've never worn them.  So the other day I was talking with a friend and she mentioned jean skirts.  Looking them up on Pinterest I can say there are a lot that I don't approve of.  I don't like the overlap crotch look.

I had also just recently seen a post about a peekaboo pleat.  So I decided to use the pleat on the skirt.  I don't have the mental stamina to write a true tutorial, but I'll give a general idea.

I chopped the legs off and ironed out the cuff ( I got 9 more inches that were hidden away up there!)

I used one pant leg, ripped out the side seams and cut each half into 3rds, so I ended up with 6 pieces of denim.

I cut out 6 pieces of the purple fabric to sew in between, pleated the denim in about 1 1/4 inches on each side and sewed them all together.

I hemmed the skirt just by folding the bottom edge up twice and sewing at the top and bottom of the fold.

I also removed the giant belt loops since I knew I wouldn't wear it with a belt and they just seem weird and giant so I scrapped them.

I folded the bottom edge of the top of the jeans up and sewed the pleated section to it, (again sewing at the bottom and top of the fold) and tada!

Refashion, Jean, Denim, Skirt, Pants, Box Pleat, Peekaboo Pleat,

I realize the pictures make me seem like a little school girl with the high socks.  But I was wearing them under sweat pants (I'm resting, remember?)  

I also realized as I took the pictures that, as much as I love my craftsmanship on the skirt, it's not really my style.  So I took one thing I wasn't going to wear and made something else I'm not going to wear.  Soooo....
I'm probably going to sell it.  Once I take that big step and open my etsy shop, it'll be up for grabs!

See you soon!

Monday, August 1, 2011

Project #11a-11n

Clutch Mania

So I decided for the end of the year to make thank you gifts for the teachers at the school I work with, and I have 3 boxes full of fabric swatches that a friend at Pratt gave me, so I decided to shoot two birds with one stone and make some gifts out of those swatches. And this is what happened.
I made 14 in bags in the space of 5 hours. I was getting button holes done in 45 seconds. They are quite simple and I actually complicated them more than I needed two. It's two swatches and a button, pleated on the bottom for expansion room and buttoned at top to keep the flap down. Very simple design, but the fancy upholstery fabrics make the clutches durable and elegant without crazy designs. I was lucky enough to have friends and family help me start a great button collection a few years ago. It was fun and simple and I got them done! That's my favorite part.

Wednesday, June 8, 2011

Project #10

Cat in the Hat

Yes, clearly this project was from colder days. A knit hat. On a ferocious looking cat. It's a simple knit that I've decided not to dwell on considering the current temperature. Needless to say, its a cute hat. Quite easy to knit. Got the pattern from this book, which is also full of some crazy fun patterns - way more than I'd ever wear, but fun anyways.